Ground Cherry Preserves

Every winter I pour over the pages of various seed catalogs looking for something new or unique to plant. Last spring I planted Aunt Molly’s Ground Cherries.  I wasn’t absolutely sure what I would do with them, but I was game for trying out something different.

Many people love to eat them out of hand.  My family…. not so much.  That saddened me a bit, but after some researching I found that these little beauties make a wonderful jam.

I was not to be disappointed in the results.  It was amazing! 

This year my garden was a sham due to torrential rains during most of May and early June which are my prime planting months.

BUT.

I had a surprise awaiting me.

The ground cherries reseeded themselves all over my garden.  Which brought sweet joy to my heart. God is good my friends and even in poor growing conditions He provided me these little bits of sunshine.

SycamoreLane Photography-13


This year so far I have made this jam which required pectin.  Some how I botched and it is more like syrup.  I’m thinking it would be wonderful on pancakes.  So all was not lost.

I also made this scrumptious coffee cake that only three of us thought was scrumptious.  I’m having a bit of trouble talking three of my guys into the charms of these beauties.  After it sat for four days it was even better.  So, I will definitely be making this again, but with a few alterations that may help my skeptics fall in love.

I am trying to get away from the use of commercial pectin, so I have been making a lot of preserves this summer. And so my second batch became preserves.  I love the color, the consistency, the seeds.  Yes, even the seeds.  Normally this many seeds would be a HUGE deterrent, but trust me they aren’t hard and do not get caught in your teeth.


SycamoreLane Photography-3


This is one of my very favorite jams/preserves.  Right up there with black raspberry and for me that is saying a whole lot.  I love it on toast, biscuits, or even on my PB & J.

It’s that good.

If you find ground cherries at the farmers market grab them up or consider planting them in your garden next year.  You won’t be sorry, I promise.

Ground Cherry Preserves

2 lbs. husked ground cherries

1 lb cane sugar or granulated sugar

1 oz. fresh squeezed lemon juice

In a dutch oven bring all ingredients to a low boil.   Using a potato masher mash the berries.  Cook until berries are soft.  Remove from heat. Place in glass bowl. Cover with parchment paper and top with a plate. Place the bowl in refrigerator over night. 

On the following day place preserves back into dutch oven.  Bring to a boil and cook until the preserves start to thicken.  Use a cold metal spoon to test for doneness of the preserves.

Place preserves into hot and sterilized half-pint canning jars.  Wipe down rims of the jars and top with sterilized lids and rings.

Process in a hot water bath for 10 minutes.  Turn off heat and let set an additional 5 minutes. Remove from canner set on towel and let set undisturbed for 24 hours.

Remove ring wipe down the jar.  Label and store.

Yield 4-5 half-pints

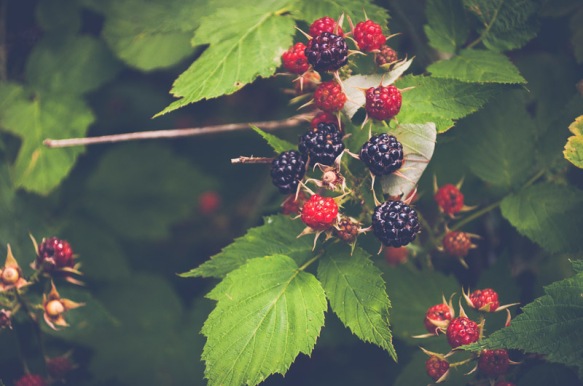
Black Raspberry Jam without Pectin

SycamoreLane Photography-3-2

With this recipe you can make preserves or a jam.  I prefer less seeds in mine so I run my berries through a food mill to extract the juice and eliminate a good portion of the seeds.  The premise of this recipe is that you can use whatever berries you have.  If you only have one pound of berries then use 1/2 a pound of sugar and 1/2 ounce of lemon juice.

I like bigger batches so I try to get at least 4 pounds of juice each time I make this.

Black Raspberry Jam

4 lbs of washed and sorted berries (or 4 lbs extracted juice)

2 lbs of sugar (white or pure cane)

2 oz of freshly squeezed lemon juice

Bring ingredients to a boil.  Continue boiling.  Stir to prevent sticking and scorching.  Cook down until jam thickens and passes the spoon test.  Take a cold spoon dip into the jam hold it about 12 inches above the pot.  Tip it and if the jam is jelled it will side off the spoon in a glob rather than dripping.

Ladle into hot canning jars. Top with lids and rings.  Process in a hot water bath ten minutes.  Yield 4 pints + 1 half pint

Blueberry Baked Oatmeal

Blueberry Baked Oatmeal-w_thumb[9]

Blueberry Baked Oatmeal

(adapted slightly from Lynn’s Kitchen Adventures)

3c  quick cooking oats

1/2c  brown sugar

1 1/4c  milk

2 T butter, melted

2 eggs

2t baking powder

3/4t salt

2t vanilla

1c  vanilla yogurt (or 1 cup plain yogurt or sour cream)

1 1/2c-2c  blueberries

Mix everything together, except blueberries in a large bowl.  Gently fold in berries. Place in greased 9×13. Bake at 350 degrees for 25-30 minutes or until center is just set.

Serve hot. 

Serve with pats of butter and a sprinkling of brown sugar.  And if your throwing caution to the wind, not counting calories, or are just up for some rich yumptiousness, douse it with a generous helping of half-n-half. You’ll thank me, truly you will (at least, that is, until you step on the scales:).

Pumpkin Pancakes~ Recipe


SycamoreLane Photography-Pumpkin Pancakes with Apple Cider Syrup


It’s cold here and gray.

Its on day like this that I want to bake… A LOT!

One of my favorite ingredients to use this time of year is pumpkin.

The cold weather, moody skies, and bare trees just signal to me that we should eat  more pumpkin!  One of our favorite recipes that uses pumpkin is Pumpkin pancakes.  They are a favorite around here.  So much so that I had to triple the recipe.  The following recipe is enough for my family of six (3 teenage boys) to have some leftovers, including some for my parents (my mom loves these). You could even put them in the freezer and pull them out for breakfast on another day.


Pumpkin Pancakes (original recipe from Gooseberry Patch Cookbook)

3 cups all purpose flour

6 Tablespoons sugar

6 teaspoons baking powder

1  1/2 teaspoons salt

1  1/2 teaspoons cinnamon

1 teaspoon pumpkin pie spice

6 eggs

3 cups milk

1  1/2 cups cooked or canned pumpkin

6 Tablespoons canola oil


Combine dry ingredients in a bowl.  In another bowl, whisk eggs, milk, pumpkin, and oil together.  Add dry ingredients to the wet ingredients and whisk until almost smooth.  Pour batter onto a lightly greased griddle.  Cook till pancakes are golden brown, turning to cook second sides when pancakes have bubbly surfaces and slightly dry edges.  Makes 24-30 standard sized pancakes.


Apple Cider Syrup (recipe from Gooseberry Patch Cookbook)

3/4  cup apple cider or juice

1/2 cup brown sugar

1/2 cup corn syrup

2 Tablespoons butter

1/2 teaspoon lemon juice

1/4 teaspoon cinnamon

1/8 teaspoon nutmeg

Combine all ingredients. Bring to a boil. Reduce heat; simmer uncovered 45 minutes- I hour or until to desired thickness (this is a thin syrup more the consistency of real maple syrup). Let stand 10-15 minutes before serving.


The last time I made the Apple Cider Syrup I doubled the recipe and used the leftovers to make granola.  I used the syrup to replace the water and sugar in my recipe.  It was really good.

Tomato Juice Cocktail

Tomato Juice Cocktail


10 quarts of tomatoes washed cored and cut into quarters

4 green peppers seeded and cut into chunks

2 carrots cut into chunks

4 small celery stalks cut into chunks

2 medium onions cut into chunks

Place tomatoes into a heavy duty stock pot, cook on high.  Place the remaining vegetables in the blender with 1 cup of water and puree.  Add pureed vegetables to the tomatoes.  Add 3 cups of water to the tomatoes and vegetables . Bring mixture to a boil and cook until tomatoes are soft.  Run the softened tomatoes and vegetables through a food mill.  Discard skin and seeds. 

Place juice back in the stock pot.

Add:

2 Tablespoons + 2 teaspoons canning salt

3 teaspoons season salt

1 1/2 teaspoons garlic powder

Bring juice to a boil and boil for 10 minutes.

Place 2 Tablespoons of lemon juice in each quart jar (This helps insure correct acidity).  1 Tablespoon for pint jars.  Pour hot juice into hot canning jars.  Place in hot water bath.  Process quarts for 45 minutes; pints 40 minutes.  (Start counting your processing time after the water in the canner has returned to a boil.)

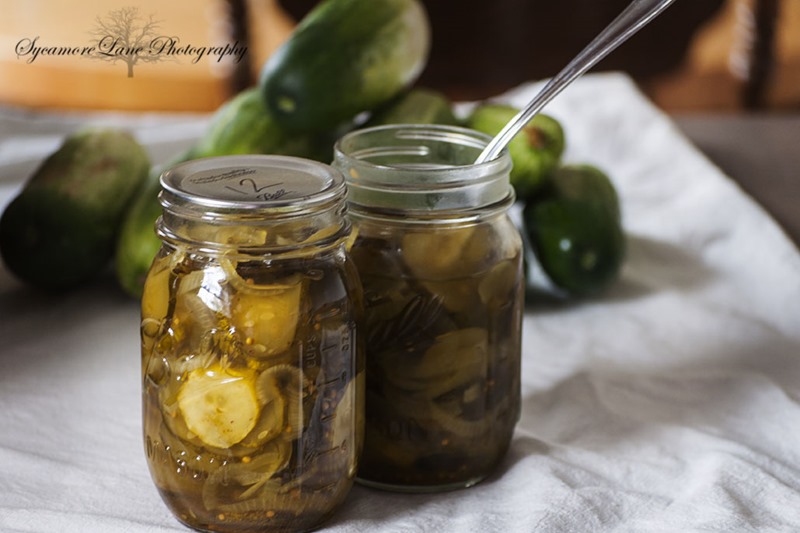
Bread and Butter Pickles


Bread and Butter Pickles


16 cups of sliced (unpeeled) cucumbers

8 small onions sliced into rings

Place onions and cucumbers in a large bowl sprinkle with 1/2 cup canning salt.  Cover with ice cubes and let set 3 hours.

In a stock pot combine:

5 cups sugar

1/2 teaspoon celery seed

2 teaspoons mustard seed

1 1/2 teaspoons tumeric

1 teaspoon ground cloves

5 cups apple cider vinegar

Bring the brine to a boil.  Drain and rinse the cucumbers and onions.  Add the cucumbers and onions to the brine and bring back to a boil.  Fill hot jars with cucumbers, onions, and brine.  Leave 1/4 inch head space. Process in a hot water bath 10 minutes.  (Start your count time after the water in the canner has returned to a boil.)

Yield: 6-7 pints

Pumpkin French Toast Casserole


Pumpkin French Toast Casserole-w-SycamoreLane Photography


Pumpkin French Toast Casserole

(original recipe here.)

Preheat oven to 350 degrees and grease a 9×13 inch pan.

8 eggs

1 t  vanilla

2 t  cinnamon

1/2 t  cloves

1/4 t  nutmeg

1/4 t  ginger

2 T  white sugar

1/4 c  milk

1- 15oz can pumpkin puree

~Mix all the above ingredients into a large mixing bowl.

~Cut up a 2 lb loaf of French bread into 1/2 inch cubes.

(I have an old standby recipe that I use for my French bread and so I always make it fresh. But, you could also use store bought or even a loaf of Texas toast bread.)

~Place the bread into the pumpkin mixture and toss until the bread is well coated.

~Pour into prepared baking pan.

~Mix together the following in a small bowl, until crumbs form.

1/3 c  brown sugar

1/2 t  cinnamon

2 T  flour

1 1/2 T  butter, softened butter.

~Sprinkle over the top of the bread.

Bake 30-40 min or until golden brown and knife inserted comes out clean.


This was a huge hit with all my guys. I served it with big mugs full of fruit smoothies.  The combination of the pumpkin and spices was perfect! It wasn’t icky sweet like some french toast casseroles can be.  There was very little left. My boys kept going back for more and if my youngest son, who has been sick, had joined us for dinner I’m sure they would not have been a single crumb left.  It’s that good!

Hard Rolls

Bitter cold days produce in me this need to bake bountiful quantities of bread and hot meals.  What a blessing to be able to do this.  I am so grateful to God for providing food for my family and for those in my neighborhood who are in need. 

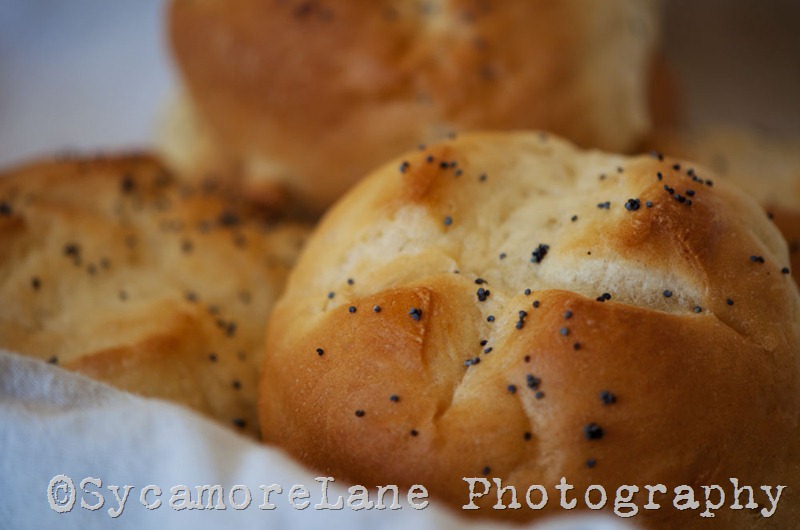
One of my guys recent favorites are these hard rolls.  I didn’t have a single one left the night I served them.


hard rolls-web

Hard Rolls

(recipe from: The Secrets of Jesuit Breadmaking)

4 1/2- 5 1/2 c   all purpose flour

2 T  sugar

1 t  salt

1 T  active dry yeast

4 T  butter, softened

1 1/2 c  warm water

1 egg white


For the Glaze:

1/2 c  water

1 t  cornstarch

Poppy seeds


Combine 1 1/2 c of the flour, the sugar, salt, and yeast in a large bowl. Cut in butter.  Gradually add water to the flour mixture and beat for 5 minutes. Add the egg white.  Beat for another 5 minutes, adding flour until dough begins to pull away from the side of the bowl. (I did this portion by hand since I do not have a mixer that does well with bread dough.)  Turn out on a lightly floured surface.  Knead 8-10 minutes, until dough is smooth and elastic, adding flour as necessary to prevent stickiness.

Lightly oil a large bowl.  Place dough in the bowl and turn to coat on all sides. Cover and let rise in a warm place, until doubled in bulk, about 45 minutes.

Line baking sheets with parchment paper or grease sheets and sprinkle with cornmeal.

Punch down dough. Turn out again, cover with a towel, let rest 10 minutes. Divide in half and shape into two 9 inch rolls.  Cut each roll into nine 1-inch pieces and form each into a small ball.  Place on the baking sheet and 3 inches apart. Cover with towel and let rise until doubled- another 45 minutes.

Preheat oven to 450.

To make glaze, mix water and cornstarch in a pan. Bring to a boil.  Cool slightly before brushing on rolls. Slit tops in a crisscross fashion.  (I cut the tops before I let the rolls rise. I wasn’t sure how easy it would be to cut the rolls once they had risen.) Sprinkle with poppy seeds.

Bake for about 15 minutes.  Transfer to a wire rack to cool.

yield 18 rolls


So as you can tell from this post our days have been pretty quiet.  I have enjoyed them.  I needed some quiet!  It has been good to just be home, I love the coziness of it all.  To be able to focus on school and the needs of my family is just what I have been needing.  And for a girl who loves the snow, but can’t do the bitter cold it’s been a wonderful week of watching the snowflakes from the warm side of my window!

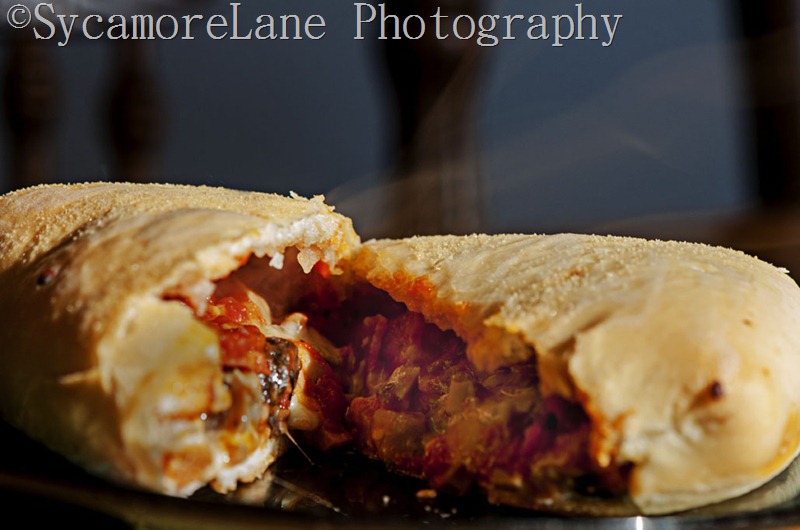
Home Made Pizza Rolls

My family loves anything and everything pizza.  So I find myself making pizza or pizza type foods a couple times  a month… at least.

For a while I have been making a recipe for Chicken Broccoli Rolls that I just love.  One night when we were eating these Joel just happened to casually mention that these rolls would be perfect with pizza topping stuffed into them.

Being the loving wife I am I decided to surprise him one night with Pizza Rolls.

These can be a bit time consuming, but they are well worth the extra effort.

The recipe that follows is what I make for 3 boys voracious boys, 2 adults, and my daughter who can pack it away just as good as her brothers can.  You can easily cut this recipe in half or increase it if need be.


Home Made Pizza Rolls

Dough:

2 packages of yeast (this is equivalent to 4  1/2 t)

2 c  warm water, divided

2 t  sugar

1/2 c melted butter, cooled to room temperature

5-6 c flour white, wheat, or a combination. I tend to use 1 to1  1/2 cups wheat and the rest white.

3 t salt

In a bowl dissolve yeast in 1/2 c water. Stir in sugar and let set for 5 minutes or until bubbly. Pour in cooled butter and remaining water, stir.  Add 2 cups flour and the salt.  Mix well using a hand mixer for approximately 2 minutes. Work in as much of the remaining flour as possible by hand. Knead for about 10 minutes or until dough isn’t sticky.  Place in a bowl and let rise for about 1 hour or until doubled in size.  Punch down, cover and let rest for 30 minutes more.

In the meantime prepare your toppings:

Sauce:

Use your favorite recipe or store bought brand.  I use a pint of my home canned tomato sauce mixed with a can of tomato paste, a pinch of sugar, a bit or garlic powder and a tablespoon of a pizza seasoning that I buy from our local Natural Grocery.

Toppings:

Be creative!  We use any of the following,i depending on what I have on hand:  sausage, bacon, peperoni, diced ham,  fresh tomato,onion and green pepper sautéed in a bit of olive oil, green or black olives, mushrooms, feta cheese, and mozzarella cheese.


Pizza Rolls- SycamoreLane Photography


Assembly:

Divide dough into 18 pieces.  Roll out one piece of dough into a circle, keeping dough about 1/4 inch thick don’t go to thin or your dough will break and your topping will leak out.  Place amount of sauce that you like on the circle to within an inch of edges. Place desired toppings on top of sauce.  Here you will have to experiment with how much you want in the roll or in our case how much you can fit in the roll!  Using warm water wet your finger and go around the edges of the dough.  Fold in the edges of dough and seal together.  Flip the roll over and place on a greased cooking sheet.  Repeat with remaining 17 pieces of dough.  Before placing in the oven poke with a knife or fork to create vent holes for the steam to escape.  I actually cut my children’s initials in their rolls, because everyone had different toppings in their rolls.

Bake in a 375 degree oven for 15-20 minutes or until golden brown.

Remove from oven brush tops with butter.  Sprinkle with garlic powder and Parmesan cheese.


Pizza Rolls-1-SycamoreLane Photography


Oh and try not to burn your mouth by being to eager to taste these. ( I personally wouldn’t know anything about that…Ah-hem)

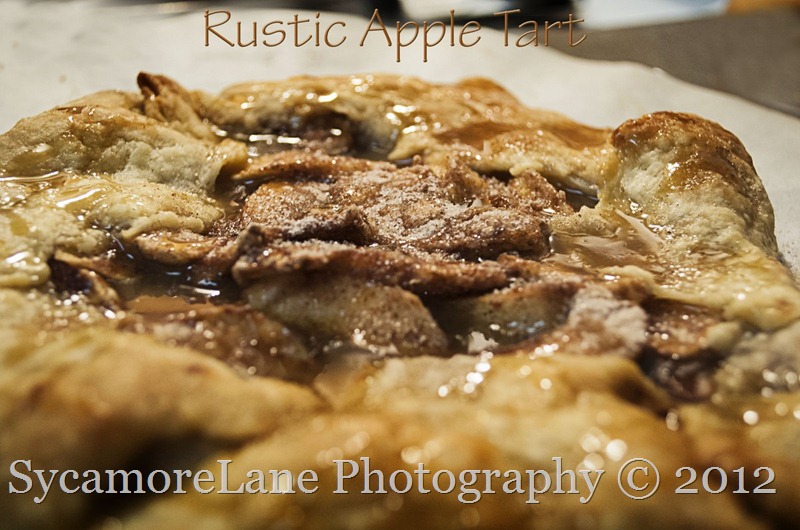
Rustic Apple Tart


Rustic Apple Tart


Rustic Apple Tart

Pastry:

1 1/3 c  flour

2 T  sugar

1/4 t salt

1/2 c  butter

13 t  cold water

1/4 t  vanilla

Filling:

4 cups thinly sliced apples

7 T sugar

3/4 t cinnamon

pinch of nutmeg

2 1/2 T flour

Topping:

Cinnamon sugar mix

Caramel ice cream topping

Combine flour, sugar, and salt; cut in butter until crumbly.  Gradually add water and vanilla, toss with a fork until a ball forms.  Cover and refrigerate for at least 30 minutes.  Divide dough in half. Roll into 10” circles.  Transfer to parchment paper lined baking sheets.  Combine filling ingredients. Spoon over pastry within 2” of edges.  Fold up edges of pastry over filling.  Leaving center uncovered.  Sprinkle cinnamon/sugar over the filling.  Bake in a 400 degree oven for 30-35 minutes or until crust is golden brown.  Slide onto cooling racks.  Drizzle with caramel; serve warm.


~This recipe is the BEST! The crust is flaky and the filling just right.  It is definitely one of my favorites for topping off a warm, filling, autumn, comfort food meal.